The Modding
Knowledgebase
Apolyton CTP2 archives
Source Code Project SVN
|
|
CTP2 Bureau The Modding Knowledgebase |
|
Apolyton CTP2 forums Apolyton CTP2 archives Source Code Project SVN |
 |
Search the site: |
Making New UnitsThe following script is a simple introduction for beginners. Look also into the script from Harlan Thompson „HOW TO MAKE CTP UNIT GRAPHICS“. There are a lots of other useful informations.by Tobias TeetzIf you you just want to check one new unit, you don´t need moving, attacking or dying animation. For the check you need now only five pictures for each unit (backview, unit angling upward, sideview, angling downward, straight downward). The figure of the straight downward view should be placed on the right side of the black frame. The first three figures should be placed nearly in the center of the black frame.
Starting with digital-photosMake five pictures of your desired figure (backview, unit angling upward, sideview, angling downward, straight downward). The background for your photo should be single-colored - you can chose e.g. a colored sheet of paper (avaiable in every copy-shop). Copy this pictures into the computer. Open a program which is useful for picture-work (for example Adope Photoshop or the Micrografix Picture Publisher). You don´t need very expensive programs. I posses the very old version from Micrografix Picture Publisher 6.0 from 1995 and it is possible for me to make units with this very old program. The following working steps were made with Adobe Photoshop 5.0 LE. Open the first picture (File/Open/File of your digital picture) from the digital
camera and prepare a second empty picture (File/New) with small size (e.g. 50*100
pixels for a human unit). Mark (select) your unit as a rectangle from the photo
and copy (Edit / copy) it into the empty, second picture (Edit / Paste). You
must transform the size of the unit (Edit / Transform / Scale).
The next step is to transform all colors around your figure in one single color
(I have chosen pure black = R: 0, G: 0, B: 0). This is necessary because you
should transfer your unit in the GublankMA1.0 file.
In the last picture everthing outside of the figure is black. Save this picture if you want to make an animation (e.g. Lord1). Then adjust the color tolerance of the magic wand (that depends on the figure: 0-50%), mark (select) the black sourrounding, exchange the marking to the figure (only a few pixels of the border should be black depending on your magic-wand-adjustment) and copy (Edit / copy) the figure. In the GU-blankMA1.0 file (from Harlan Thompsons „How To Make CTP Unit Graphics“) you need a new layer (Layer / New / Layer – Opacity100%,Mode:Normal) Layer 2. Put in this layer the figure (Edit / Paste). You can see the new layer (Window / Show Layers). You must adjust the size (Edit / Transform / Scale). Your figure should be placed in the white square. The figure can be made bigger like this:
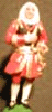
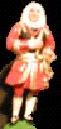
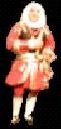
The advantage of bigger figures is: You can see more details of the unit. The disadvantage of bigger figures is: The green marked cursor in the CTP2-game can hide some parts of the had or of the feet. You should make a test. Keep in mind: Everything outside of the figure (what you don´t want to see in the ctp2-game) must be pure black (R: 0, G: 0, B: 0). Use the magic wand to mark (select) the surrounding of the figure, then exchange the marking to the figure (Select /Inverse). Maybe you want to deminish the selection (then: Select / Modify / Contract). Make a new layer from this selection (Layer / New / Layer via copy) Layer 3. Then go back to the Layer 2, exchange the marking to the surrounding of the figure (Select / Inverse) and make the surrounding of the figure (the present selection) pure black (R: 0, G: 0, B: 0). The magic wand with 0% tolerance shows pure black areas. No pixel in the present selection should be different from pure black – this is important for the MS-Dos exe- program. Go to the Layer 1 and delete this layer (press the symbol with the garbage pail or by Layer / Delete Layer). Do the same with the backround layer. Go to Layer 2 and mark (select) the black area with the magic wand (0% tolerance). If the black area is selected go to Layer 3 (the Layer 2 needs a linked-symbol beside the eye-symbol. Press the mask-symbol in the Toolbox: The mask (outside of the figure) is now red. You can save the first view of the unit ( File / Save a copy / Filename: GUblank1MA5.0.copy Save as: TIFF(*.TIF). Save it with Tiff-option: IBM-PC (and the LZW-compression box must stay empty). Save the file in a new datafolder 97 (File / New / data folder). This new datafolder 97 should be in the same folder as the makespr.exe program and the Gu97.txt file. Copy the GuOnlyMove5pictur.txt file and rename it to Gu97.txt (but this should stay in the same folder as the makesp.exe – not in the 97 data folder). The Gublank1MA5.0. copy should have a size of 30 KB. If the file has less something is wrong with your file. Repeat the above procedure. Sometimes you want to make a figure with transparent areas inside of the figure (press then: Select / Similar) . Prepare now the other four views as described above. Here is my result from a tin figure:
I haven´t made only the backview, the oblique backview, the siedview, the oblique sideview and the frontview. For a very good unit there should be an angling (like for the cow) and the unit should be smaller. Then you can rename the five different unit files in the 97 folder to: GU97MA1.0, GU97MA2.0, GU97MA3.0, GU97MA4.0, GU97MA5.0 according the sequence above. MS-DOS WorkIf everything is ready I minimised all the windows of my computer and started MS-DOS (Start / Programme / MS-DOS). This line appears in MS-DOS: C:\ WINDOWS> You can go backwards with the command: C:\ Windows>cd.. (Enter) The MS-DOS-line: C:\ will appear. Go forward with the command: C:\ >cd AimDataFolder (Enter) [AimDataFolder = the next data folder in the sequence, repeat this until you reach the makespr.exe , Gu97.txt file]. You can check a data folder by the MS-DOS command: dir (Enter) If a data folder has more than 6 letters, e.g. : longwordfolder, give in: longwo~1 (Enter) (after 6 letters: ~1) If you reached the right data folder with the makespr.exe program, the Gu97.txt and the 97 data folder give in: C:\ AimDataFolder1\AimDataFolder2\AimDataFolderN)>makespr –u 97 (Enter) If everything works perfect you will find the message: Processing `GU97.txt` If not you have made a mistake with the mask (e.g. some pixel outside of the figure is not pure black). If everything is correct you should try this new sprite in the ctp2 game. You find the new sprite: GU97.spr in the same folder as the makespr.exe program. It can happen that the contrast is not good or that some views of the sprite are not in a good position or the spite is to big. So better you check it in advance about to avoid useless work ! My advice to check the unit: copy the Gu97.spr and put it in the spites data folder of a scenario with new units. E.g. my scenario of the Seven Year War has six new sprites. You find the Sprites data folder in : scen000 / default / graphics / sprites. You can try to make an animation of Lord1. Try it now on your own: Work with the Lasso Tool to select some parts of a figure (legs, arms etc.) copy these parts to a new layer and twist them by (Edite / Transform / Rotate). Change the Gu97.txt file according the number of animations . Look to the example from Harlan Thompson. Make other files ready for the new unitIf you want to play with the new unit in the game or in a new scenario, you must change some other files. New icons of the unitYou need three new icons for every new unit. Look in the pictures folder of the ( ctp2_data / default / graphics / pictures). An Upup-file indicate an icon. The number 130 must be the same as in the new sprite (e.g. Gu130.spr). The new sprite should have a number over 95 (otherwise an old sprite of the game will be replaced). Open one „l“ -file of any unit of the game in a picture-work program like Adobe
Photoshop.
Open one GuNumberMA Num.0.tif picture from your new sprite work. Select your new figure and copy it into the empty upupEmpty_l.tga file.
Save (Save a copy) the picture under upup97l.TGA (Targa) (Image Size Weidth:160 pixels, Height:120 pixels) 16 bits / pixel. Change the image size (Image / Image Size) to: Weidth: 32 pixels, Height: 24 pixels, Repeat this procedure to : Weidth: 24 pixels, Height: 18 pixels, All the picture work is finished now. Files of the gamedata folderOpen the gamedata folder (default / gamedata), the three files: Units, Uniticon, Newsprite (or for an Apolyton Game: APOL_Units, APOL_Uniticon, Newsprite) are important. Starting with Newsprite: For the new Lord –sprite you must can write: SPRITE_LORD 97 (Because of your new sprite Gu97.spr) Save the newsprite -file. Open the Uniticon file: This file is in an alphabetical sequence. Place the: ICON_UNIT_LORD under the : ICON_UNIT_LONGSHIP you must write your UPUP097(a,b,l).TGA in this line. All the other details in this line are important for the GREAT_LIBRARY file (english / gamedata / GREAT_LIBRARY). Look to other units in this file and you understand what to do. Every command in this line must appear in the GREAT_LIBRARY. Open the Units file: This file has a sequence by number. This is important. The last number is: ## UNIT 71 For the new unit you need the subsequent number: 72 ## UNIT 72 It depends now what kind of units you like to make. If the unit shall possess similar abilities as an Infantry look for the INFANTRYMAN (##UNIT 32). Copy everything beginnig with the first bracket ending with the last bracket under the new UNIT_LORD Change: DefaultIcon ICON_UNIT_INFANTRYMAN to: DefaultIcon ICON_UNIT_LORD From Attack 25 to VisionRange 2 you can change all numbers as you like for the new unit. Very important for scenario-maker are the lines: EnableAdvance ADVANCE_GUNPOWDER You can enable your unit with a new advance. So you can give one nation a very special advance which other nations don´t possess. So it is possible to create different infantry units for different countries. It is better to do this by slic-programming – but this is more complicated. On the other hand you can make a lot of old units in this period obsolete more as usual in this period. To make some units obsolete give in an advance which is much earlier than the old advance. I hope the informations were useful for you. |

|
| This site is currently maintained by: BureauBert (Webmaster) Maquiladora (Manager) Legal Notice: Legal Notice Statistics: 333841 unique users since 02.05.2004 (» Site Statistics) Hosted by: WebhostOne |